-40%
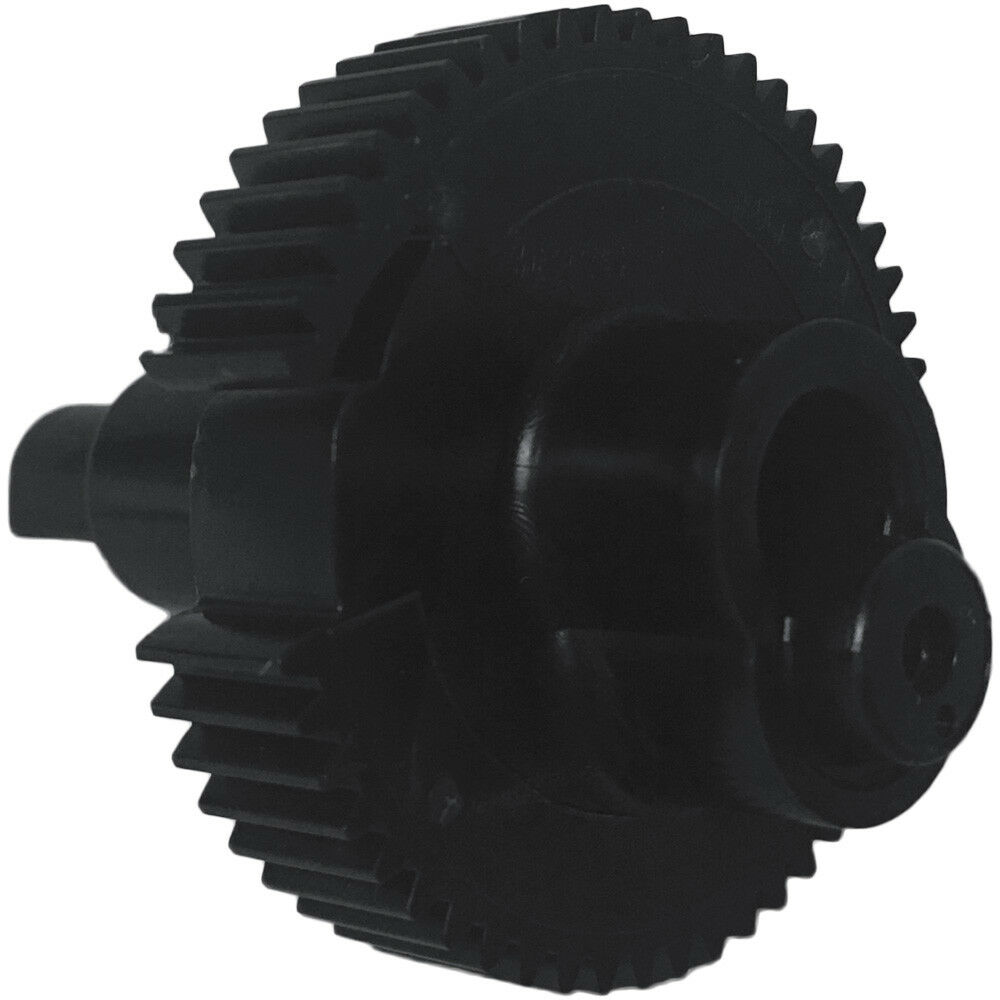
Main Gear & Shaft for Mechanical Fleck 5600 (Part 13170)
$ 10.55
- Description
- Size Guide
Description
Main Gear & ShaftMain gear and shaft that moves other gears and moves piston up and down. Replacement instruction are found in the -inchMore Info-inch tab above.
Fleck Part# 13170
This is a genuine Fleck part and is part# 13170
Product Description
Main gear & shaft for the Fleck 5600 control head (Fleck part# 13170). This is typically the only gear that may break or wear out.
More Info
Replacement Instructions
1 ) First, remove "power head" from the valve body. Three screws (one in the Main Gear, center of Main Piston, and the TWO on either side of Main Piston ), slide forward slightly and then up.
2 ) On the back of power head, remove Brine Cam Gear.
3 ) On the front of power head, remove label on the center of the control knob to expose flat head screw underneath. HOLD THE MAIN GEAR in place ( don't let it "fall out" the back ) while you remove the screw in the center of the control knob on the front.
4) Once the Screw is out, TURN the power head face DOWN, and slowly LIFT the Main Gear Shaft UP and Out.
NOTE:
Under the Main Gear you will find TWO small Ball Bearings sitting on TWO small springs. IF you have the New Main Gear Shaft in hand, now would be the best time to slide it into the power head. HOLD the new Main Gear from behind, and put the front knob ( and actuator gear or arm, 24 hour wheel, etc ) back in place ( everything only "fits" the correct way ). Screw the knob to the Main Gear.
**ALIGNMENT**
5) Only "trick" to doing this is the replacement of the Brine Cam Gear. The "hump" on the Brine Cam Gear must be aligned with the "gap" in the Main Gear. This alignment occurs 1/2 turn ( 180 degrees ) from the IN SERV position ( or the middle of the Brine Rinse Cycle ). * If you do it correctly, you will be able to turn the front knob and "run" the power head through ALL the cycles with out it getting STUCK in the middle of the Brine Rinse cycle.
6 ) Put the Power Head back onto the Valve Body. Replace the Three screws. Remember to set the Time of Day on the Front.
